
DIY Paver Patio: How to Plan, Estimate, and Build Your Outdoor Space
A DIY paver patio is one of the most practical upgrades you can make to your yard this summer. It gives you a durable, low-maintenance surface for grilling, relaxing, and entertaining, and it costs far less than a full deck build or a poured concrete slab. Best of all, it is a project most homeowners can handle over a weekend or two with the right prep.
The hardest part of any patio project is not the labor. It is getting the numbers right before you buy a single paver. Once you have a clear plan for size, shape, and materials, the actual build moves fast.
Plan Your DIY Paver Patio Layout First
Start by measuring the space you want to cover and sketching the shape on paper. A simple rectangle keeps material calculations easy, while curved or multi-level layouts add visual interest but require more cuts and planning. Think about how the patio connects to your house, your yard, and any existing landscaping.
Once you have a rough shape in mind, planning your outdoor living space before peak season keeps your project on schedule and your materials in stock. Getting ahead of the seasonal rush also gives you more flexibility on delivery timing and product selection.
Choose the Right Paver Material and Pattern for Your Yard
Not all pavers perform the same way, and the material you choose affects both the look and the lifespan of your patio. Concrete pavers are the most budget-friendly option and come in a wide range of colors and finishes. Natural stone pavers such as flagstone or bluestone cost more but bring a distinct, upscale look that concrete cannot fully match. Brick pavers sit in the middle and pair well with traditional home exteriors.
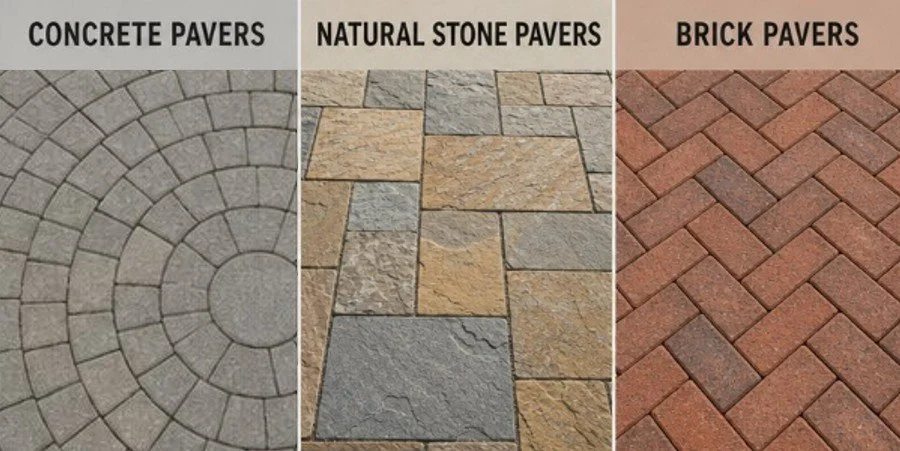
The pattern you choose also affects difficulty and material use. A running bond or basket weave pattern uses fewer cuts and suits most DIY skill levels, while herringbone and circular patterns look striking but require more precise cutting and a bit more patience. If this is your first paver project, a simpler pattern gets you a professional result without the steep learning curve. If you are also tackling other outdoor upgrades this season, landscaping projects tend to go smoother when you plan your material list all at once.
How Many Pavers Do You Need for a DIY Paver Patio?
This is the question that trips up most first-time DIYers, and it is also the easiest one to solve. Once you know your patio dimensions and the size of the paver you want, the math comes down to square footage divided by paver coverage, plus a buffer for cuts and waste.
Rather than doing that math by hand, plug your patio dimensions into our free Estimator and get an exact paver count in seconds. You will also see recommended quantities for gravel, sand, and edging based on the same measurements, so you know exactly what to pick up when you browse patio blocks in the color and shape that fits your layout.
Prep the Base and Gather the Right Tools
A paver patio is only as good as what sits underneath it. Skip the base prep, and you will deal with shifting, sinking pavers within a season. A few steps make the difference between a patio that lasts and one that needs redoing:
Excavate the area to a consistent depth, typically six to eight inches for a patio that sees regular foot traffic.
Lay landscape fabric across the base to block weed growth without trapping water.
Add a layer of compactable gravel and tamp it down in stages, not all at once.
Finish with a thin bed of leveling sand raked smooth just before you set your first paver.
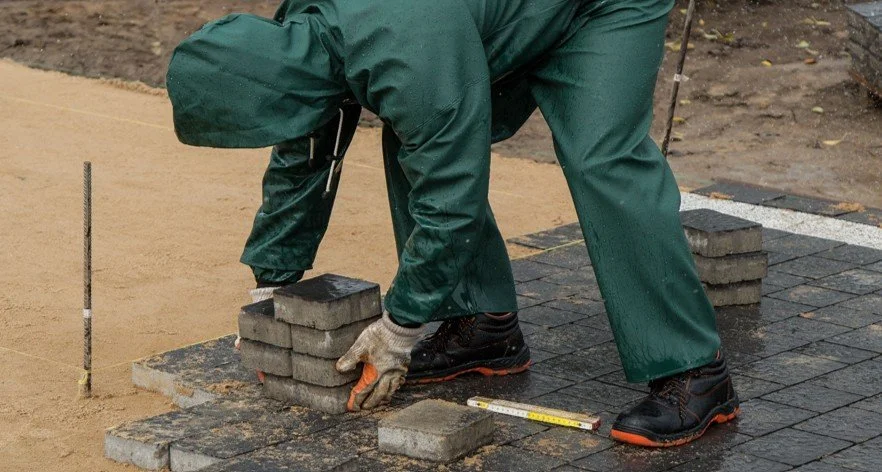
A plate compactor turns hours of manual tamping into a quick, even pass across your whole base layer, and most homeowners only need one for a day or two. You can rent a plate compactor for the job, along with specialty tools such as a paver saw for clean cuts around curves and edges.
Lay the Pavers and Set the Edging
Work from a fixed corner or straight edge and set each paver tight against the next, checking level as you go. Small gaps are normal and get filled later, but large gaps or uneven pavers will show once the whole patio is down. Once your field is laid, install edging around the perimeter to lock everything in place and keep pavers from shifting outward over time.
Sweep polymeric sand into the joints and mist it with water to activate the bonding agent. This step locks the pavers together and helps prevent weeds and ants from settling between the joints.
Finish Your Outdoor Living Space and Keep It Looking Sharp
With the patio in place, a few finishing touches turn it into a true outdoor living space rather than just a slab in the yard. Low-profile solar lighting along the edging adds safety and ambiance without wiring, and a simple seating area or fire feature extends your patio season well into fall.
A well-built paver patio holds up for decades with very little upkeep. An occasional sweep, a fresh layer of polymeric sand every few years, and prompt attention to any shifted pavers keep the whole surface looking as good as the day you laid it.
Not sure how many pavers you need? Plug your patio dimensions into our Estimator and get an exact count, no math required. Start your free estimate today at Akin Building Centers, and stop by your nearest location if you want help thinking through material choices in person.